Chicken Piccata

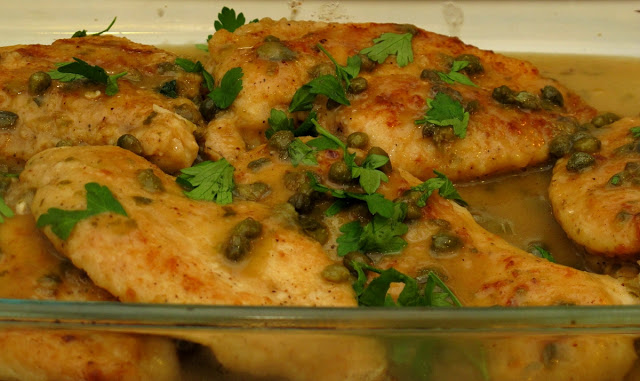
Today's recipe is an Italian chicken dish that I made a couple days ago.  I've had chicken piccata at restaurants, but this was my first time making it here at home.  It turned out DEE-lish.  First off, ANY dish that uses fried chicken as a base can't be all that bad and combined with lemon, buttery flavors--it can't help but be a winner.


Ingredients

Directions

Season chicken with salt and pepper. Dredge chicken in flour and shake off excess.
In a large skillet over medium high heat, melt 2 tablespoons of butter with 3 tablespoons olive oil. When butter and oil start to sizzle, add 2 pieces of chicken and cook for 3 minutes. When chicken is browned, flip and cook other side for 3 minutes. Remove and transfer to plate. Melt 2 more tablespoons butter and add another 2 tablespoons olive oil. When butter and oil start to sizzle, add the other 2 pieces of chicken and brown both sides in same manner. Remove pan from heat and add chicken to the plate.
Into the pan add the lemon juice, stock and capers. Return to stove and bring to boil, scraping up brown bits from the pan for extra flavor. Check for seasoning. Return all the chicken to the pan and simmer for 5 minutes. Remove chicken to platter. Add remaining 2 tablespoons butter to sauce and whisk vigorously. Pour sauce over chicken and garnish with parsley.

Tips & Mods

-I actually didn't alter this recipe in any way.  I will say though, if you're not a person who is big on lemon-y flavors--you may want to reduce the quantity of lemon juice by just a tad.

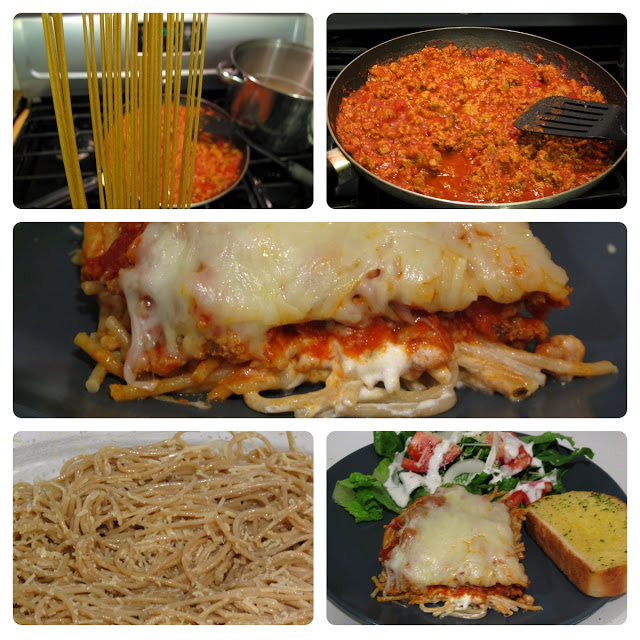
-This is an Italian dish, so whenever I've been served this in a restaurants, it was always over pasta or another pasta dish was with it as a side.  I wasn't wanting pasta this particular day, so I had it with oven-roasted broccoli and Parmesan mashed potatoes. 

Hope you guys enjoy!

Recipe courtesy of Giada de Laurentis of The Food Network

Pink Zebra

Perfect weekend outfit for me.  These palazzo pants I'd bought months ago from Forever 21 with the intent of wearing them during the summer.  They are a really comfy knit material--almost like a sweatshirt for your legs.  They are a navy and like a salmon zebra print.  The top is a heather gray top that I've had for so long, I'm not sure where it's from.  Threw on my current fave wedge booties and was ready to seize the day.


Oh, and just took about 4+ inches off my hair and i love it!! It looks and moves much better while straight or curly.  I feel less Amish now. lol

Fall Transition

So, the other day I was at home bored and something inside of me said "Hey, why not play some dress-up?"  I looked into my closet and immediately came up with the idea to style one of my summer dresses into an autumn/winter dress.  So the first thing I did was pick a dress.  I chose this one because of all my summer dresses, it was only one of few that wasn't overkill with bright colors (because that's not very autumn-y), and the fact that it is strapless would give me some options with layering.  So, here's how I "winterized" my dress--real simple, I (a) put it on over a turtleneck, (b) added tights, and (c) threw on some fall/winter shoes, well booties.  So in a nutshell, that's how yours truly would winterize a summer frock.  This can be done with rompers too, of which you'll probably see in a future post.  The jury is still out on how I feel about THIS particular dress being winterized.  Not sure if I'm really feeling the silhouette, but hey, thought I'd post the pics anyway.  Honeybadger don't care!


Fab Mom: Style Inspiration

I was skimming through past posts of mine and realized that pretty much all of my "style inspiration" posts where I'm highlighting a celebrity or public figure's style, were all women with child(ren).  So I've decided to purposely make a "fab mom" style inspiration post weekly.  Just to show and prove that being a mom does not have to hinder anyone's ability to look great or be an inspiration to other mom's or even childless ladies.  I hope to feature some real life mom's and of course, celebrity style as well.

First up:  Jennifer Lopez.  This dress KILLS.  It's okay to still show some leg ladies (well in her case, a LOT of leg), even after having babies.

If anyone happens to catch a knock-off of this, let a girl know!


J.Lo in Argentina last week.

Pashmina Luv

My neighborhood is so beautiful this time of year.  Colorful trees all around leaving their mark with all of the leaves on the ground.  I decided to take a few pics of what I'm wearing.  Sometimes I wear my scarves as part of my outfit, instead of as an accessory to my outfit. It's kind of like turning a pashmina into a vest.  Vest-mina anyone?


Old Navy shirt
F21 pashmina-esque scarf
vintage belt
UO jeans
Target booties

Hair Babble: Instead of French Braids, French Twists?

So as you've seen in a previous post, one of my quick go-to styles is when I put my hair into two french braids and wear that a couple days (from laziness and also allowing it to airdry), but then ultimately taking them down to wear a loose, fluffy braidout.  Well, I decided to try out this same formula with two big flat twists instead of braids.  I did this (1) because it's a bit quicker and less hair tangling while putting them in--working with 2 pieces vs 3 pieces with a braid is significant, (2) because twists don't hold as tightly as a braid, they dry faster, and (3) and due to #2 just mentioned, they shrink up more, which will give me a bigger/fuller style.

Now with these big twists, they will not reform your curl like a braidout would--or twists done on smaller sections of hair.  This will more than likely just elongate and stretch your existing curl pattern.

Twists just put in on wet hair.

I put in the twists after dousing my hair in coconut oil, once sectioned I applied the Shea Moisture Curl & Style Milk and then twisted.  Do you notice in the middle picture that my edges have thinned slightly at the temples?  Yea, that's from postpartum shedding.  Another "perk" (sarcasm) of pregnancy that they don't warn us about!  I experienced it with my first son, and it grows back. I may do a whole post on it. lol

See the shrinkage?

This is how I wear it out of the house while running errands.  Just throw a hat over it.  [I run army green into the ground, as you can see.]  I'm also not opposed to wearing the style without the hat.  It just depends on how neat I am able to get the flat twists each particular time.  I don't, however, stress over getting them super neat.

Final result
Verdict is in--I can live with this.  It took me all of 5 minutes to put the twists in, only a day to air dry and I basically have a stretched glorified wash-n-go.  Because it is stretched--it will last me longer than a wash-n-go, so it is definitely worth the 5-10 prep.  Also, as I'm typing this, my hair has fluffed out more and I like it even more.  I rushed and took this pic immediately after I took it down.  So, yea, when I'm tired of walking around in a bun--I will just do this.  Because it is stretched hair, I am able to pull it up into a bun or ponytail easily as well! 

Take care!

xoxo,
-Nik

Not Your Ordinary Spaghetti

Today's dish I'm sharing with you is a spaghetti dish that I make about 2-3 times a month.  I think it's pretty common that most families have a "spaghetti night"  regularly because it is usually a cheap meal and can yield enough leftovers to last another night.  According to my husband, I "can never do anything 'regular'"--and I guess the same goes for our "spaghetti night" dish. haha  I'm just not a big fan of regular old spaghetti.  I found this dish on one of my favorite recipe sites and it's been in my repertoire ever since.  It's really just dressed up spaghetti & meat sauce.  Enjoy!


TURKEY SPAGHETTI PIE

Ingredients:
2 ounces uncooked spaghetti, broken in
half
1 egg, lightly beaten
2 tablespoons grated Parmesan cheese
3 tablespoons sour cream
1/2 pound ground turkey
1/4 cup chopped green pepper
2 tablespoons chopped onion
1 teaspoon butter or margarine
1/3 cup tomato sauce
1/4 teaspoon garlic salt
1/4 teaspoon dried oregano
salt and pepper to taste
1/3 cup shredded mozzarella cheese
Directions:
1. Cook spaghetti according to package directions; drain. In a bowl, combine the egg, Parmesan cheese and spaghetti. Press spaghetti mixture onto the bottom and up sides of a greased shallow 2-cup baking dish or 7-in. pie plate. Spread with sour cream.
2. Crumble turkey into a skillet; add the pepper, onion and butter. Cook over medium heat until meat is no longer pink; drain. Stir in the tomato sauce, garlic salt, oregano, salt and pepper. Spoon into spaghetti crust. Sprinkle with mozzarella cheese. Cover edges loosely with foil. Bake at 350 degrees F for 15-20 minutes or until heated through and cheese is melted. Serve immediately.

Tips & Mods:

- Skip the whole sauce making and just use 2/3 jar of Ragu sauce.  I use the sauteed onion & garlic flavor.

- I also add about a teaspoon of sugar to the the turkey & sauce.  It cuts some of the "sharp" taste that tomato sauce can have.

- Sometimes I add hot pepper flakes for a little kick, if I know that my son won't be eating it--which he usually doesn't. He'd rather have PB & J or hot dog. *sigh*

- I always use whole wheat pasta.  It's like quadruple the fiber and it doesn't taste any different from regular pasta.  Before it's cooked, it looks slightly brown, but once cooked it pretty much takes on the color of regular pasta.

- I use a lot more cheese than is listed.  I use about a cup of parmesan in the pasta, and I COVER the dish in mozzarella.

Flashback Friday Anyone?


Since we happened to be on the subject of fitness and health in my last post, I thought I'd share with you all this picture one of my friends posted on Facebook of me when I was in my 8th month of pregnancy.  I ADORE this picture because I think it epitomizes the tone of both of my pregnancies.  I still always had lots of fun, and I was always very much active.  I get a lot of props from people I know because of my "snap back" ability after having my kids.  Most don't realize that I was very much in shape prior to getting pregnant, which makes it A LOT easier to get back down to where one would like to be, and also, I continued to workout and remain active for as long as I could through each pregnancy.  It really is no magic secret to it!  Anyway, hope you all have a slammin' weekend!


xoxo,
-Nik

Keep It Tight: A Little Motivation

So my youngest has finally reached the 3 month old mark, which means he is now old enough to stay in the Kids Zone at the YMCA.  This is a big deal, because I can actually get back to a real workout routine that includes weightlifting/strength training/yoga/pilates.  Up until now, I've been doing mostly cardio (walking or running outside with the jog stroller), but I kind of gotten burned out on that--not to mention, it's becoming too chilly outside for my taste.  I've still hit the gym on the weekends at times when hubs is home, but that would be only once, maybe twice, a week. Anyway, to celebrate being able to get back to a REAL schedule (for me that is 3-4 times a week--no weekends), here are a few motivational photos:


Lets Move!!!

xoxo,
-Nik

Happy Halloween!


Happy Halloween!  Hope you guys are doing something fun today.  This actual Halloween day, I'm letting it be all about the kiddos.  Hubs and I plan to take my 2.5 yr old trick or treating through our neighborhood this evening.  MY Halloween was Saturday night.  I had a blast as usual and here are a "few" snaps. I saw so many creative/clever costumes!  I'm already contemplating what I will be next year. Oh, and my costume is a Hindu temple dancer. Have I ever mentioned that I'm a Bollywood fanatic?

(Click to enlarge picture)


Date Night Snaps

What is it with us and desserts?!

Me and the hubs had a quick little "date night" last night while my father-in-law visiting from the Bahamas is here.  We only stepped out for a couple hours to share a chill moment with each other and to be able to have an uninterrupted conversation (which is scarce, thanks to a 2.5 yr old).  We went to one of my favorite restaurant/lounges here in Atlanta called Apres Diem.  They are (surprise surprise) owned by the same people that own Carpe Diem, the place I posted about previously.  Whereas, Carpe is more of a real restaurant in the traditional sense--Apres has a more "lounge-y" feel, i.e. lights a little dimmer, DJ spinning, couches, candles, etc. Anyway, nothing spectacular--just a few quick snaps.  I had a raspberry tart martini (or two), and we shared a slice of pumpkin cheesecake. It didn't disappoint!

The selection.

The ambiance.

The pumpkin cheesecake.

The martini and the wash-n-go hair. ;)


Oh yea, so this is Halloween weekend!  So what are you all going to dress up as?  Are you dressing up?  My friends and I are all set to go, and I plan on having a good time at a Halloween party tonight.  As you can tell from a previous Halloween post, we like to dress up and partayyy.  Hopefully, I'm not having too much fun that I forget to take pics.  Stay tuned!

xoxo,
-Nik

Hair stuff: Bantu Knot-Out

Just thought I would do a quick post on the bantu knot out I'd done on my hair two weeks ago.  My hair had been straight for two weeks and it was time to give it a (co)wash.  I was thinking about how I would style my hair, and decided that I wanted a style with a lot of volume (which would also give the illusion of shorter hair).  I've yet to cut my hair significantly, of which I'm constantly claiming I'm going to do, so I thought maybe I could create the illusion of shorter hair. Immediately, either a flexirod set or bantu knot-out came to mind.  I decided on the bantu knots because (1) they're quicker and easier to put in, and (2) my 2 yr old has gotten his hands on my flexirods and I'm not quite sure how many I have left.

So, I co-washed in the shower and then out of the shower, I applied coconut oil to my hair.  I then begin to put in the knots.  Each section I applied Shea Moisture Coconut & Hibiscus Curl & Style Milk, detangled with the Denman brush and then proceeded to put into the bantu knot (twisting the hair into a single twist until it twists down on itself and then continuing to coil it down/wrap the hair around itself and then securing it in place with a large bobby pin).  I had 6 knots total.  I then let it airdry (which I won't do again--it took 2 days. lol), and then uncoiled each knot, separated and fluffed with my fingers.  As it gets older, it gets even curlier (from frizzing slightly) and bigger.  This style lasted me about 5 days, and it's also workout friendly! My previous "Pumpkin Patch Excursion" post, the pic of me I'm actually wearing the bantu knot out that I pulled into a bun, to take it a day further.  I think this will be my new "main" style for a while.  And no, the bangs gave me no problems!  Just pinned them back loosely with a bobby pin.

**Also, for those of you who are just getting to "know" me.  I have an extensive chronicle of my hair journey from transition to 3 years natural on Fotki <--click here.

UPDATE:  How I maintained this style at night, I'd pull it up loosely in a ponytail on the top of my head and then slept on a satin pillowcase.  The allows me to sleep on the sides of my head or even the back with out smushing the curls (especially on the ends when is the most important to the style).  For you ladies with shorter hair, all you need to do is pin the sides of your hair back loosely (so that you can sleep on the sides of your head), and sleep with a satin bonnet or satin pillow case.  I sprayed my hair every couple days with Hot Six Oil SPRAY (yes they have a spray as well) to keep it looking shiny and fresh. HTH

Mommy Style Essential: The Crossbody Bag

Left: Cloth crossbody bought from an Indian store in Seattle (<--one of my most fave places ever)
Right: Canvas army green (I'm a fiend for army green, by the way) from Walmart--12 bucks!!!!!

As you could probably assume, after becoming a mother, there are lots of little adjustments a girl must make to her wardrobe.  Moreso, after becoming a mother of two!  I will say, one item I cannot live without are "crossbody" bags.  They come in all kinds of shapes and forms--messengers, saddle bags, fabric Indian sling bags (one of my personal faves), etc.  There are plenty of times when I'm out and about that I need to be able to have access to BOTH of my hands, and the crossbody allows that--all the while allowing me to still look stylish.  Plus, in this day and age, it's just not wise to carry a bag that you may have to sit down (like in a shopping cart) while you tend to other things.  "Sticky fingers" in grocery and department stores have been on the rise here in Atlanta.  Plus, a lot of the cross bodies (especially the fabric kind or the messenger style) allow room for me to toss a sippy cup and/or the baby's bottle into it when I'm just going to be away from the car for an hour or less while shopping.  I mean really, do you really want to lug around a diaper bag when you're just going to be in and out? No.  But you definitely need to have the kid essentials (juice, bottle, snacks) when all hell breaks loose.  Now if something major like a diaper change HAS to be made (i.e., diaper explosion)--I can always go back to my car.  I have an SUV, so the back portion has become my portable changing table on plenty of occasions. I digress...

So these days, as much as I like all of the different styles of handbags available--you'll more than likely catch me wearing a crossbody.


Lucky Brand, Linea Pelle, American Eagle, MICHAEL Michael Kors
ShopStyle

Family Fun: Pumpkin Patch Excursion

Just thought I'd share a few snaps of our family excursion to the pumpkin patch. The pumpkin patch admission came complete with a hay ride, bounce houses, castles, etc., petting zoo and a small pumpkin.  You could even pay extra for a pony ride.  My 2 year old, Max, REALLY enjoyed himself and is totally obsessed with his "punkin"<---how he pronounces it.


Mommy style--what I wore

Lucky Brand embroidered jacket
Old Navy striped top
F21 jeggings
DSW boots

In the Kitch: "Japanese" Beef Stir Fry

We don't really eat a lot of beef in my household, but here lately I've been wanting the feeling of being super satisfied after a meal.  I'm talking that good ol' STUFFED feeling.  So I figured some form of beef/steak would probably hit that spot.  So I found this recipe for a beef stir fry online and gave it a go.  No, your eyes are not fooling you--I'd completely forgotten to add the mushrooms, which as you can see by the recipe is a big part of the dish (4 cups!).  I think I was so busy feeling so much like an Iron Chef whipping stuff up in my wok, that I'd just completely forgotten about them. Needless to say, it still taste great.  I figure the mushrooms really just add volume, which means more food that can last over more days.  I won't forget next time, believe that!


JAPANESE BEEF STIR-FRY
Ingredients:
2 pounds boneless beef sirloin or beef
top round steaks (3/4" thick)
3 tablespoons cornstarch
1 (10.5 ounce) can Campbell'sยฎ
Condensed Beef Broth
1/2 cup soy sauce
2 tablespoons sugar
2 tablespoons vegetable oil
4 cups sliced shiitake mushrooms
1 head Chinese cabbage (bok choy),
thinly sliced
2 medium red peppers, cut into 2"-long
strips
3 stalks celery, sliced
2 medium green onions, cut into 2" pieces
Hot cooked regular long-grain white rice
Directions:
1. Slice beef into very thin strips.
2. Mix cornstarch, broth, soy and sugar until smooth. Set aside.
3. Heat 1 tablespoon oil in saucepot or wok over high heat. Add beef in 2 batches and stir-fry until browned. Set beef aside.
4. Add 1 tablespoon oil. Add the mushrooms, cabbage, peppers, celery and green onions in 2 batches and stir-fry over medium heat until tender-crisp. Set vegetables aside.
5. Stir cornstarch mixture and add. Cook until mixture boils and thickens, stirring constantly. Return beef and vegetables to saucepot and heat through. Serve over rice.

Tips & Mods:

-As you can see, it's still quite tasty with or without mushrooms, so if you're not a mushroom person, feel free to leave them out or reduce the quantity.

-I seasoned the beef with a little seasoned salt and garlic powder after I'd sliced it up and let it sit in the fridge for a couple hours before cooking.

-I also added a clove of minced garlic to the sauce ingredients.


ENJOY!